Music in Our Schools Month: Homemade Instruments to “Rock” at School
 March is Music in Our Schools Month! Schools around the country will be raising awareness of the benefits of music education and the numerous ways it enriches lives. We're sure you agree with how important music in our schools is and having children introduced to the joys of playing music at an early age.
Choosing which instrument I wanted to play in 2nd grade was one of the biggest decisions I made in my adolescence. I was torn between two: My best friend had decided to join band to play the trumpet so I considered following her, but I desperately wanted to play the guitar. When I was in kindergarten, all of the kids in my class, myself included, made little rubber-band shoebox guitars during one of our "Music Days." My fascination and love of the guitar was born then.
So, after a 4-minute internal debate with my 7-year-old self, I concluded it was a no-brainer. Soon after I got my first real guitar (which I named Jack), started taking lessons and still play to this day about 16 years later. Sadly, Jack was broken a few years ago by my little cousins who were trying to serenade my uncle while I was at school. It's safe to say little tykes should begin their musical endeavors with simpler, "starter" instruments at first. In honor of "Music in Our Schools Month" (and to inspire the littlest music makers), we've created a few homemade, kid-friendly musical instruments perfect for a mini jam session so your little ones can start their bands now! Our first installment: DIY Tubular Bells What You'll Need:
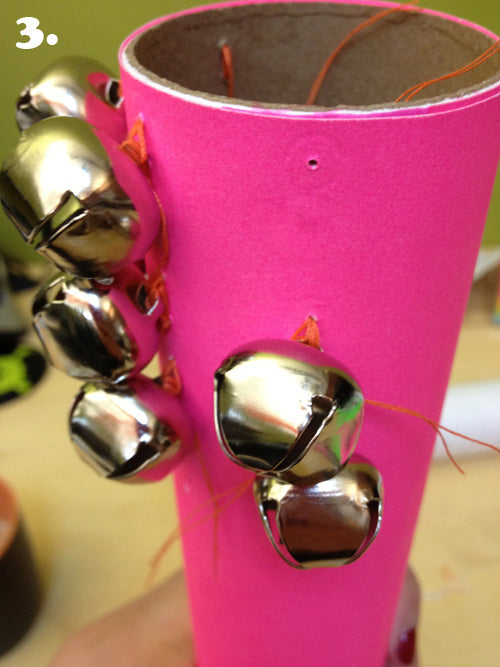
Mailing Tube (we used an 11 x 2 inch tube)
Measuring Tape
Small drill of puncturing tool
Needle and thread
21-14 bells (depending if you want stacks of three as we did or two as Minieco did)
Optional: Glue and construction paper
Instructions:
1. Decorate mailing tube as desired (we jazzed our tube up with a bit of hot pink construction paper).
2. With puncturing tool, make a line of vertical holes spaced about 3/4 an inch apart down one side of the tube (make sure not to put holes too far down as you won't be able to sew the bells on properly).
3. Repeat this step around the remaining area of the tube leaving about an inch of space between each vertical line of holes.
4. Using needle and thread, sew on bells, weaving in and out from the bottom hole up until securely fastened.
5. Continue until desired amount of bells are attached to tube.
6. Shake, shake, shake!
........


...............................

For more homemade instruments we've shared on our blog, click HERE!(Idea+Instructions via Minieco)

2 comments
Can’t wait to try this at home.
Mama T
It is a classic very useful bit of information and facts. Now i am pleased that you just discussed this useful data here. Please keep you up to date in this way. Thanks for sharing.
ace frehley les paul for sale
Leave a comment
This site is protected by hCaptcha and the hCaptcha Privacy Policy and Terms of Service apply.